Building a Commodore SX 64 keyboard cable

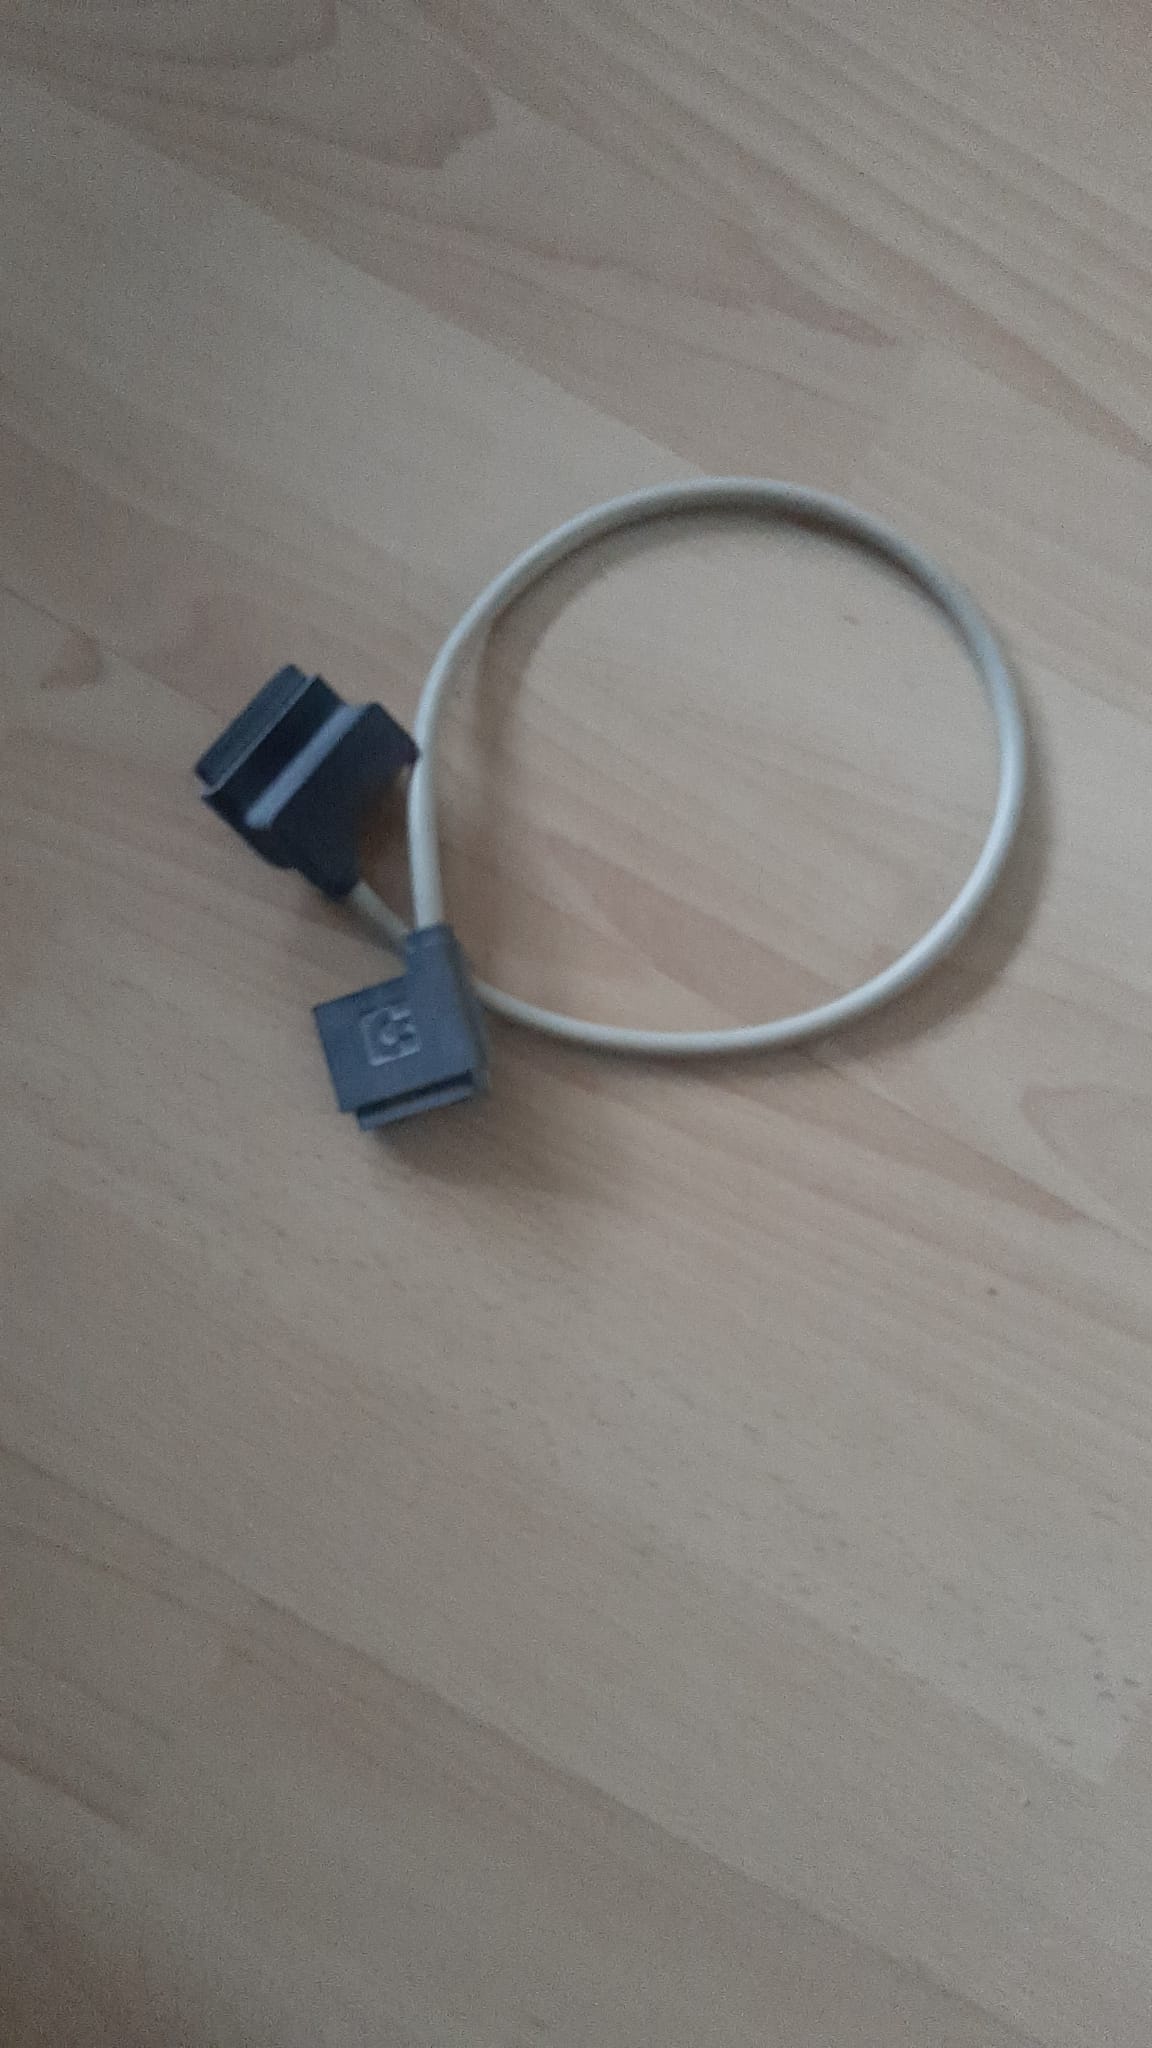
When you buy a Commodore SX 64, sometimes the keyboard cable is missing.
This is a issue as the cable doesn’t have standard connectors.
while the BD-sub 25 connector pinout fits, the commodore connector, the housing and mounting holes at both sides won’t fit.

a lot of users that are missing the cable are building one with flat cable connectors and “shave” off the “ears” of the connector, to make a replacement cable that fits.

flowerking published a 3d model of the connector that could be printed on Thingiverse.
scottpav enhanced the design so the plastic from a normal connector could be used inside the 3d printed shells
Since I also own a SX 64 without cable, I decided to order the connector parts. (JLCPCB as an shop that sells 3d printed objects).
SX64 keyboard connector shellscompleted SX64 keyboard cableso after uploading the design, JLCPCB returned with a remark that thickness was less than 1mm and that could be an issue in the end result.
I took responsibility as thicker shell would probably not fit.

after 2 weeks, I received the connector shells.
I started soldering the cable to two 25 pin DB-sub connectors, and removed the metal shield from the connectors.

Then I assembled the connectors with some hot glue, and tested the end result.
The cable worked as it should, and is much better looking that the flat cable solution.

XCPLA

XCPLA
XCPLA drop in replacement for the C64 PLA

Last meeting of the Dutch Commodore Club (near Utrecht) we run out of PLA chips.
Searching the web I came across the website called hackup that used an existing opensource design to create a drop in replacement.

So I decided that I should build some, check them and use them to fix some C64 at the club (I normally can be found next to the repair corner, helping repairing).

This version of XCPLA is for the C64, but with other HDL code it should also work in other systems.

This weekend it will be Sinclair take over, so I will bring my zx81 to try to fix them.


Joyswap release version

Joyswap rev 2.0

Last night I finished building the release version of joyswap.
This version will also swap the mouse and paddles.

Last week I received 10 pieces of my revision 2 Joyswap PCB’s.
I started to build them all, but soon found out I only had 2 40 pin sockets, so I currently only finished 2 of them.
This revision also swaps the control lines of the 4066 chip that controls the mouse and paddles.
So now it will not only swap the (digital) joysticks but also the paddles and mouse from port.
When build in, pressing the restore key for about 3 seconds will swap the ports.

Joyswap rev 2.0

These ports will be reset to their normal position when a reset of the C64 is detected.
holding the restore key for 5 seconds will swap the kernal (if kernal option is used) and resets the C64.
holding it for more than 10 seconds, the kernal state is stored in the eeprom of the attiny for next power up.

more info here .

Prototype “JoySwap” working

last night I finished the prototype of “JoySwap”.

JoySwap prototype

JoySwap is a internal joystick switch that swaps the joystick ports at a (3 sec.) press on the restore button.
Next to the swapping of the joystick ports it can also switch between two kernal roms and store the selected rom for next power up.

you can read the complete story here

SD2IEC PCB arrived

2 weeks ago I designed a PCB for my SD2IEC.
Last Friday I received them in my mailbox.

I took the schematics of ShadowWolf and used the online design tools on www.easyeda.com to draw the schematics and design the PCB.

The result is found here and I ordered an prototype ($10,- with shipping).
The SD2IEC uses a micro SD module with build in voltage converter.
The only signals missing from the SD module are Card_Detect and Write_Protect.

I routed those signals to a dip switch so I can still control these signals.
The Card_Detect signal is also routed to the SD module header, so I can modify the SD module to add this signal.

If this proto type works, I will be updating the PCB with RTC and LCD, and will move the micro SD to the main PCB.


XUM1541

This weekend, I created a XUM1541 interface base on an Arduino ProMicro board.
The interface allows me to talk to a commodore drive on my (32-bit windows) PC.

CBMXfer screenshot
CBMXfer screenshot

Now I’m able to quickly copy files over from my pc to floppy without having to use my 1541 Ultimate-II.

See the page on my site on how to build the Interface.


Found a music maker keyboard

Today, my lovely wife found a music maker keyboard at a second hand store.
So we paid the 1 Euro they asked, and I added it to my collection.

Commodore music maker keyboard

The keyboard came in it’s original box, but it has a big hole in it.
The keyboard is fine, but the tape with the program is missing,
Finding the program on the internet shouldn’t be a big problem.