I got the question if I could make a Joystick switch, So I designed one to be connected to the joystick ports.
But the person requesting didn’t like the fact that it needed to be external.
So I went back to the drawing board.
The first issues on doing a internal joystick port is how to switch the joystick ports without having to drill a hole in the case.
I thought on using the Restore key, but that key is used a lot for keyless kernal switches.
So I had to get a way to swap the joystick ports and needed a way to switch the kernal.
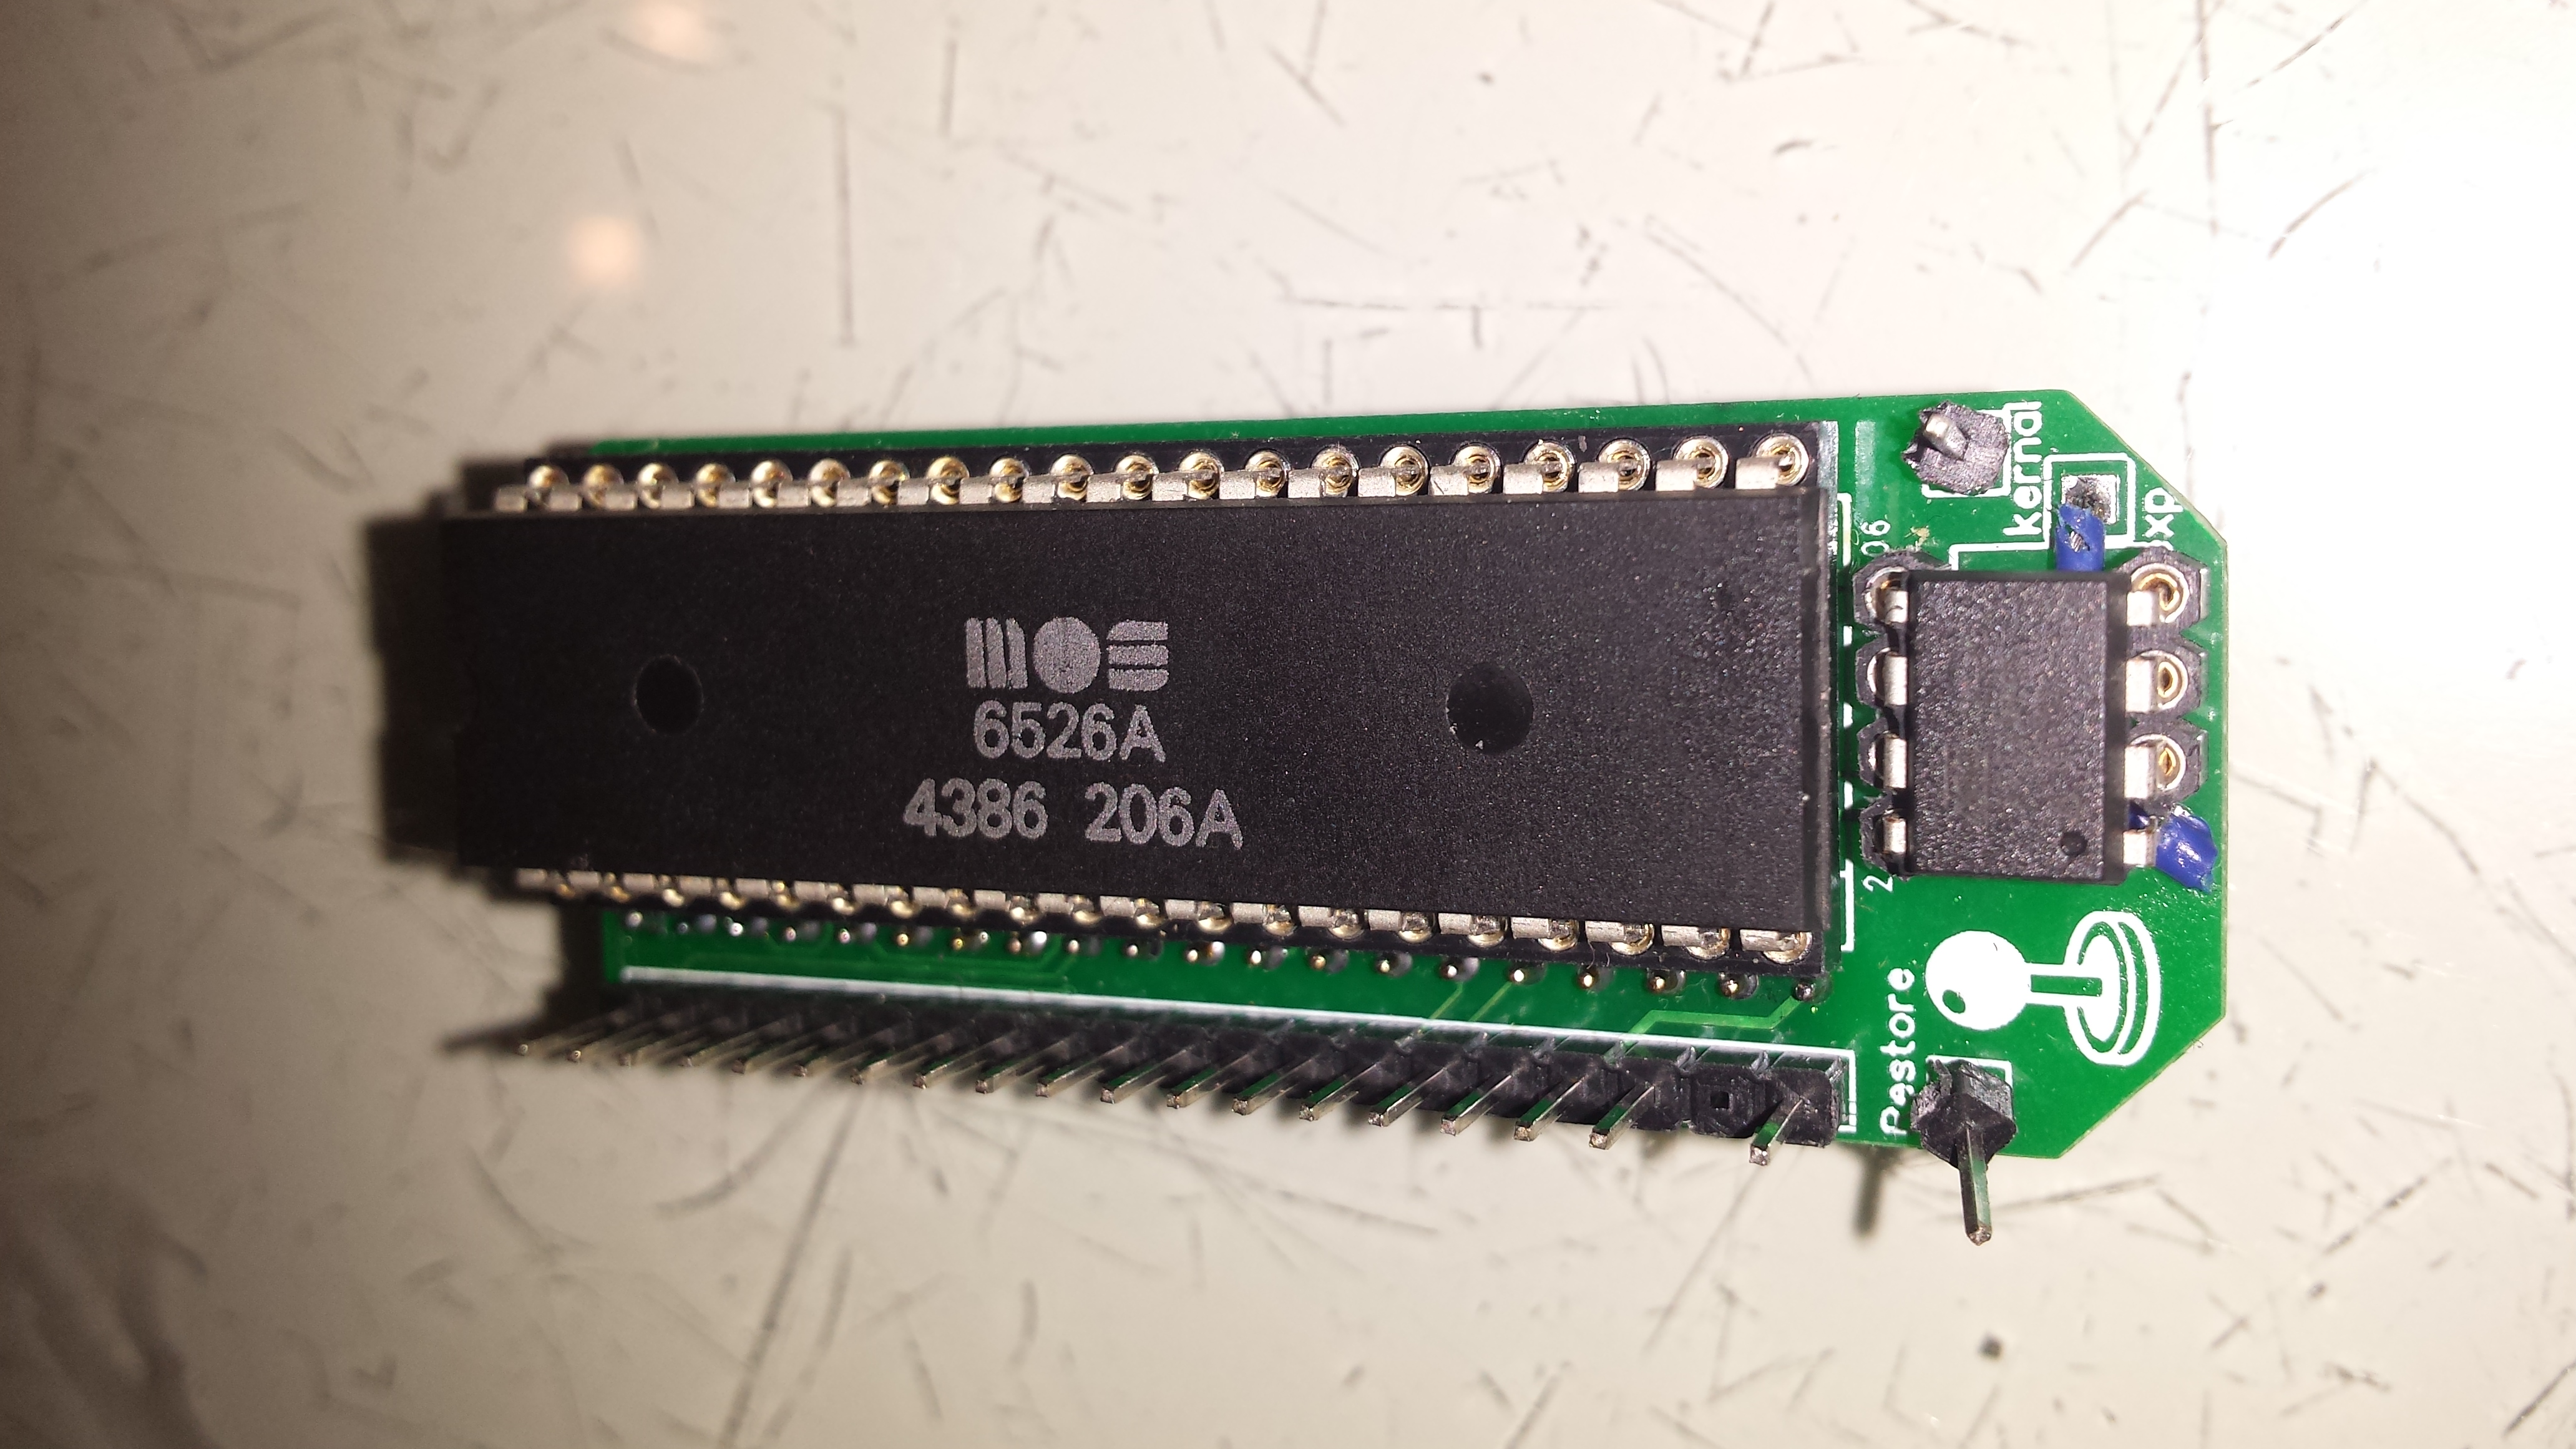
I figured out that that could be done by a little micro processor that would count the time the restore key was pressed.
so one single press would just give a restore key signal, 2 or 3 second press would swap the joystick ports and 5 second press would switch kernal.
While doing some research I found out that I even could store the settings, so a 10 second press would store the state of the kernal even if the system is powered down.
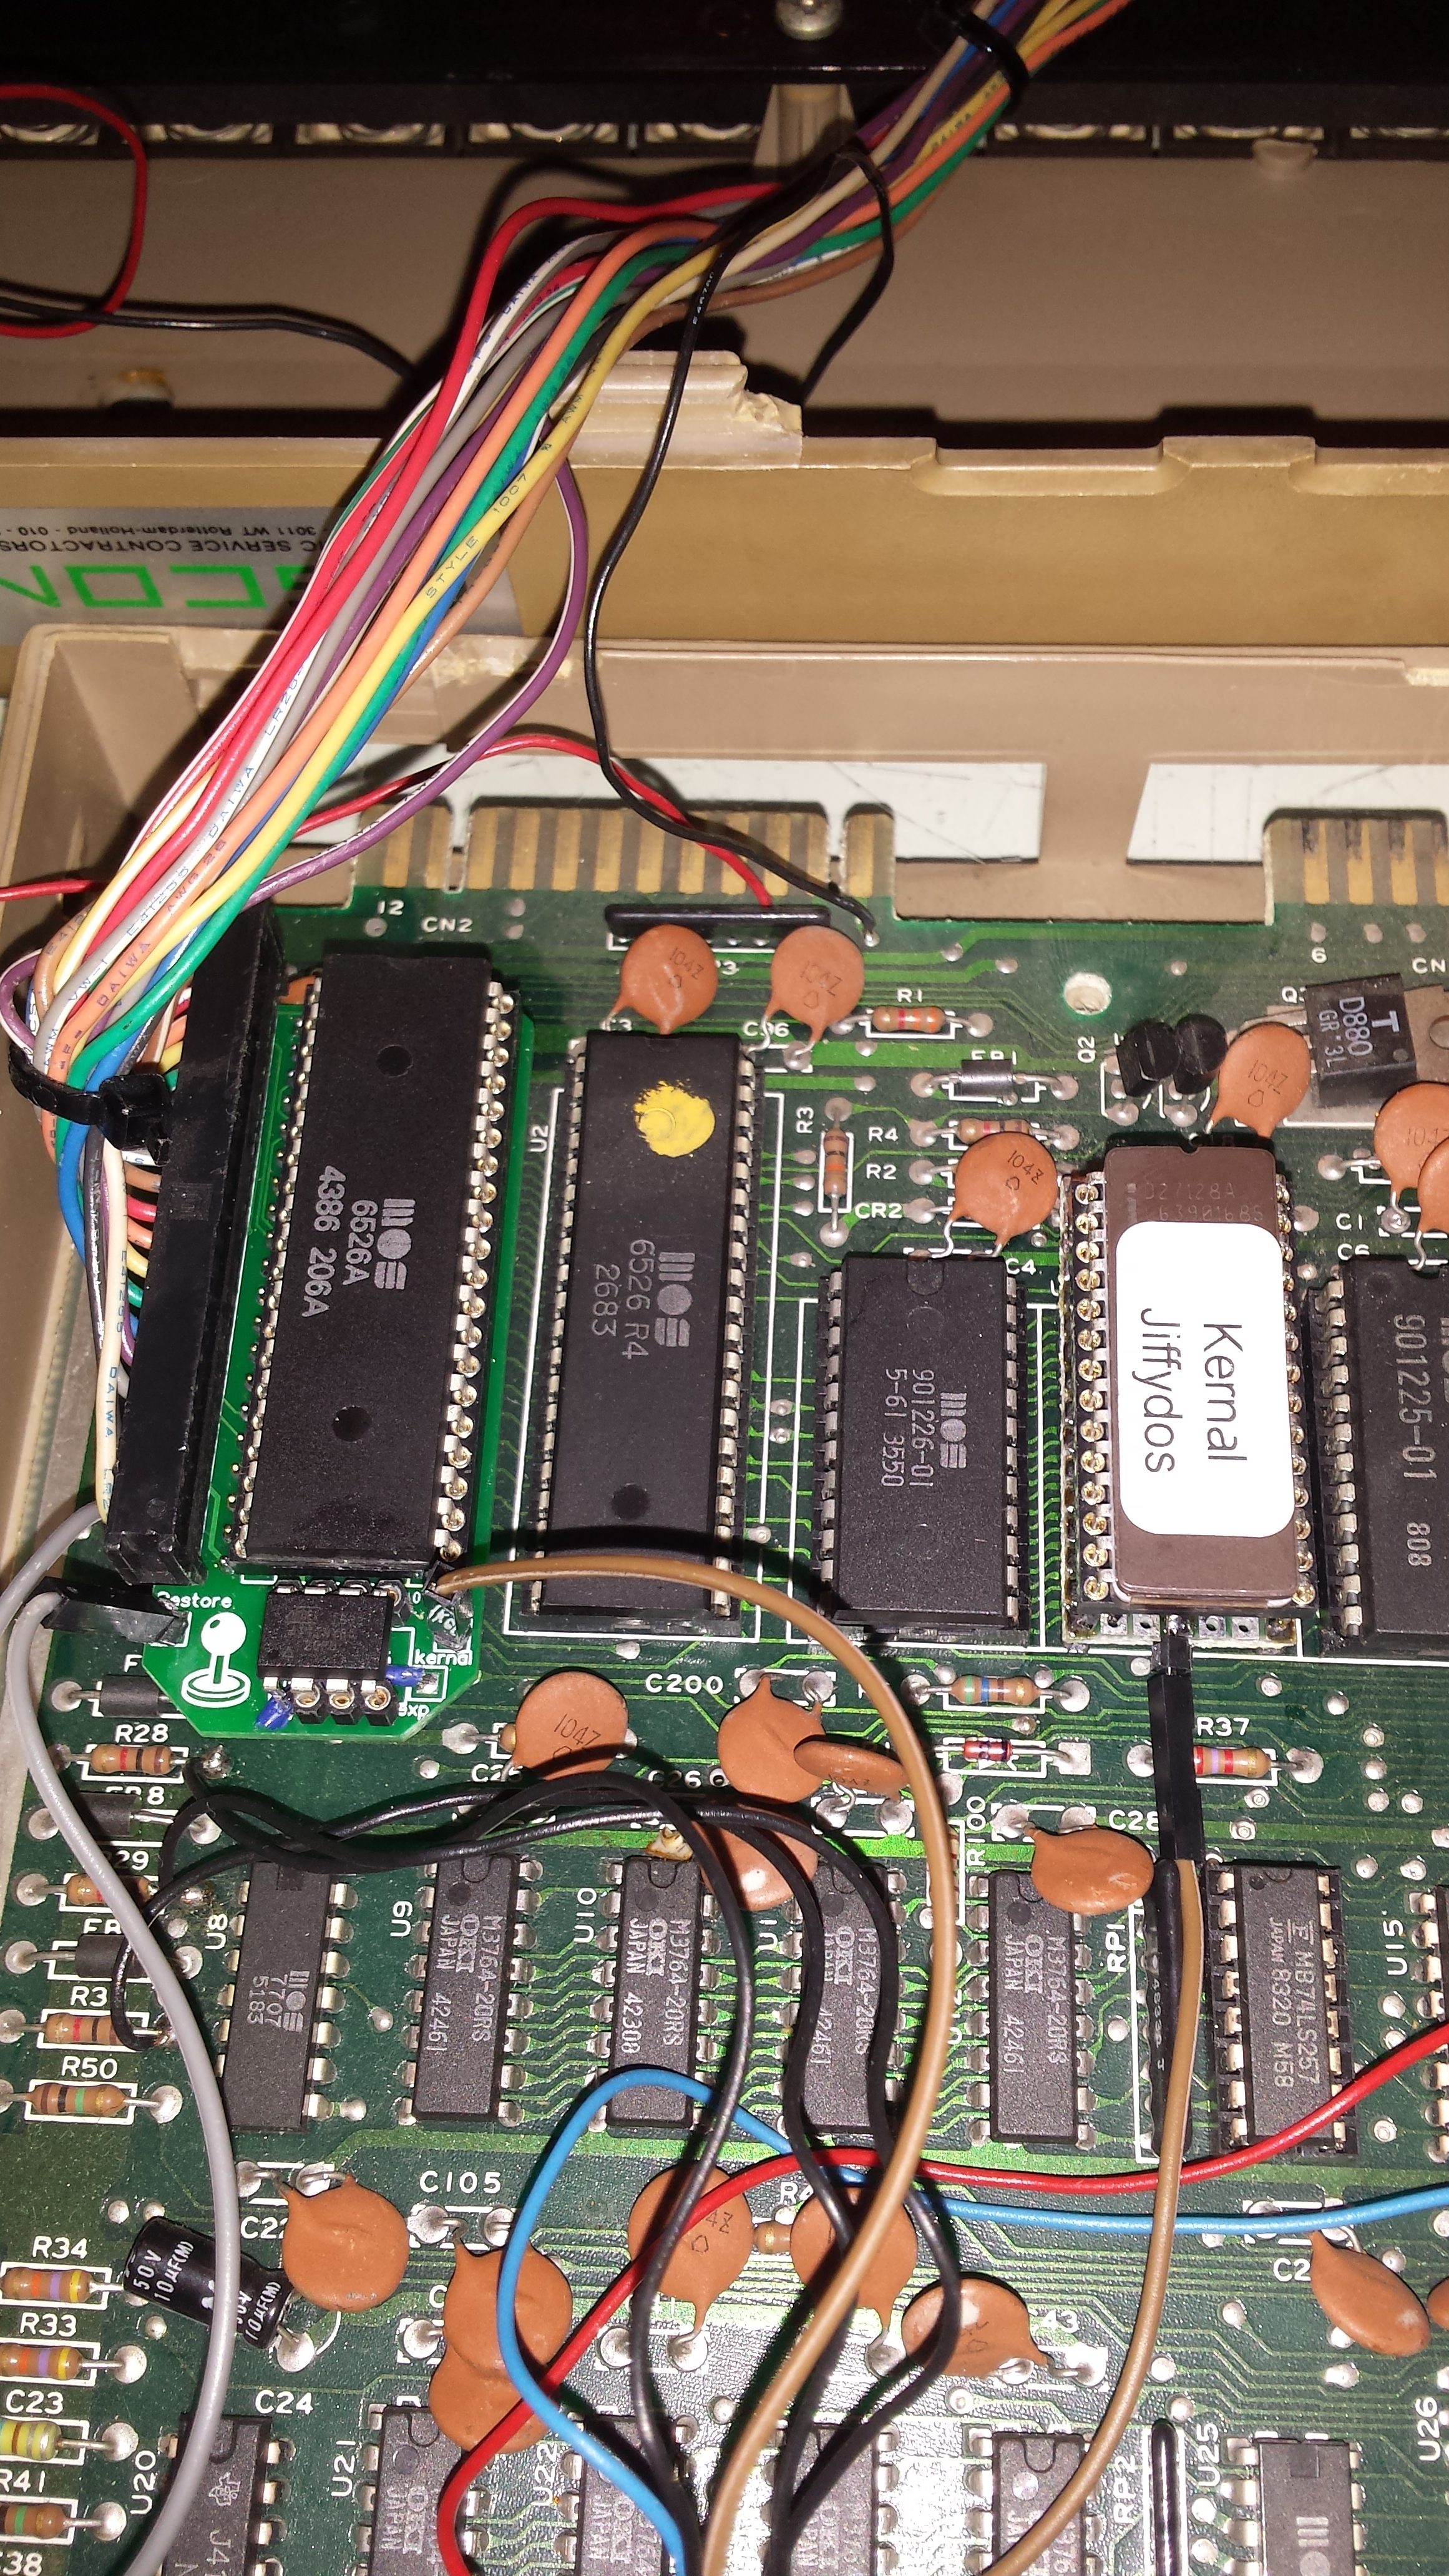
the second issues I faced was the fact that the joystick ports use the same I/O ports from the CIA as the keyboard.
As they are directly connected to the CIA there is no way to switch ports without cutting traces on the main PCB, or..
I had to remove the CIA and place it on a adapter board with it’s own keyboard connector directly connected to the CIA like it is on the main PCB.
The lines going to the main board now can be switch, so the joysticks can swap.
This prototype is only switching the digital lines of the joysticks (so no mouse or paddle swap).
Then I realized that the 4066 controlling the switching of the analog lines is also be done on the same data port.
Making it possible to swap them also.
This is done in the next revision (Rev 2.0) of the joy/kernal switch.
On newer (small C64 rev 250469) boards the PCB may not fit if there is a dual SID installed (also I’m not sure if PCB fits without ic socket as there is an component next to the CIA, I couldn’t check as I don’t own a rev 250469 board).
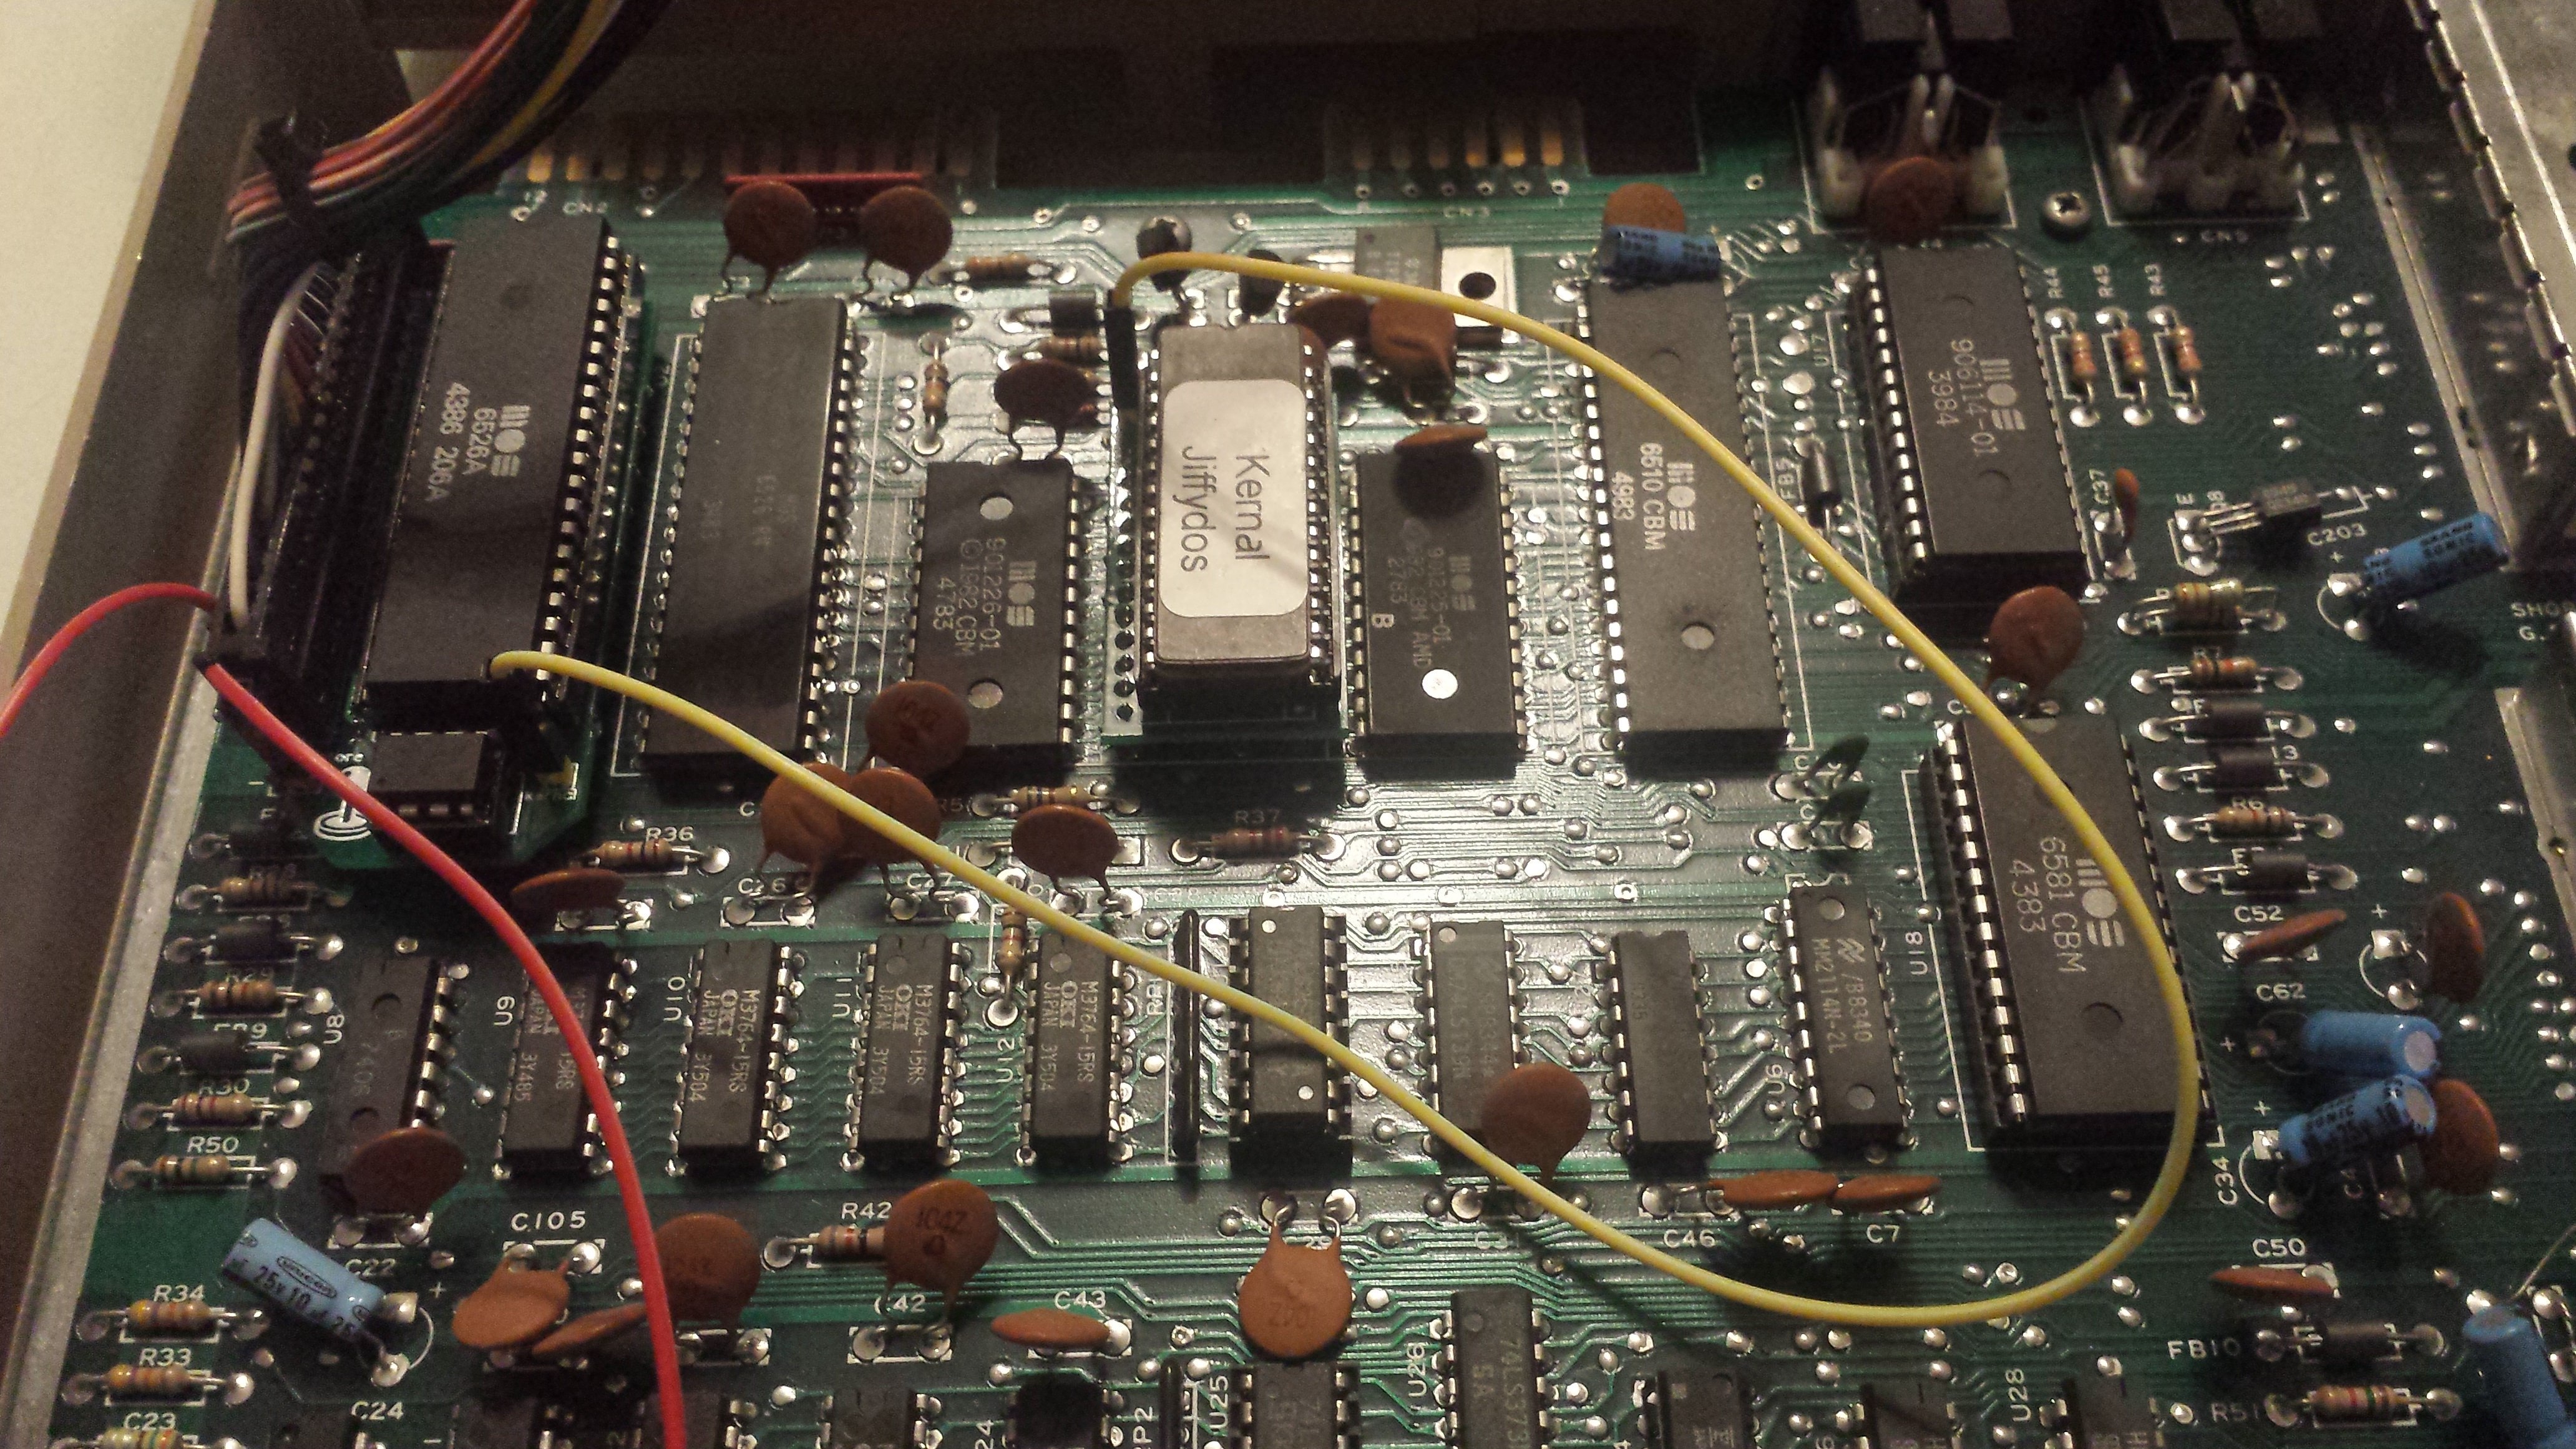
Installation of the joystick swap is done by removing the CIA nearest to the keyboard connector (old boards upper left, and new boards middle next to the SID).
This may need desoldering of the CIA if it’s soldered directly to the main PCB.
place the joyswap PCB in the CIA socket, or solder it to the PCB (your choice), connect the restore pin of the PCB to the 3rd pin of the keyboard connector of the main C64 PCB.
Place the keyboard wire to the Joyswap PCB.
Recheck if everything is connected correctly, then test if it works.

Optionally to use the kernal swap, place an eprom (27128) into the kernal adapter and place the kernal adapter instead of the C64 kernal.
This may require desoldering o the kernal rom.
Connect a wire between the kernal adapter and the Joyswap PCB labeled “kernal”.
The kernal adapter is for the old model C64 PCB, on the new model (small C64 board rev 250469) a 27256 could be placed with pin 27 bend outward.
then the pin 27 of the eprom could be connected to the kernal connection of the Joyswap PCB
Very nice little project! You don’t sell these, do you? Or do you know if somone is building and selling them?
Merry Xmas!
-Bugjam
Dear Bugjam,
Sorry for the delay, I didn’t see the notification in my mail of your comment.
Yes I will be selling them.
I already build 10 of them to be sold, but Currently I’m busy with a little manual on how to install it.
Regards,
Jeroen.
Super! Please drop me a mail to bugjam(AT)gmx(DOT)de, so I am up to date. Would have missed your reply here, if not a friend had seen it.
Wow looks really nice, I want to order 2 off them.
But I also wire a switch to this board?
Because my c64 have already a hole for a switch.
Greetings Reinier
I would also like to purchase too please! a7mag3ddon(AT)hotmail(DOT)com
Have those surfaced anywhere else aside from this page?
I actually build a couple of them to be sold (on amibay), but I never finished the guide, and I’m still not sure if it fits in a C64C (new wedge case).
Please contact me by contact form when you are interested, in buying.